How To Upcycle Old Furniture: A Beginner’s Guide
Upcycling old furniture has become a growing trend over recent years and social media is full of video reels showing ‘before and after’ creations. This trend isn’t just about breathing new life into tired pieces; it’s about sustainability, creativity, and making a positive impact on the environment. I myself am a relative beginner in this area of sustainability (I have only completed a handful of projects so far) but I have to say, this is the most enjoyable part for me – creating something functional and beautiful out of something old and forgotten. In this beginner’s guide, we’ll explore how to upcycle old furniture, offering step-by-step instructions, creative tips, and inspiration to help you on your upcycling journey. I will also provide some links to creator’s accounts that showcase excellent examples of upcycling furniture.
Before we get into the nitty-gritty of upcycling old furniture, let’s take a moment to understand what upcycling really means. Unlike recycling, which involves breaking down materials to create new products, upcycling involves repurposing items to give them a new lease on life. It’s about transforming something old and forgotten into something fresh and exciting. And when it comes to furniture, upcycling opens up a world of possibilities, allowing you to unleash your creativity while reducing waste and environmental impact.
Affiliate Disclosure: This post contains affiliate links. This means I may earn a commission should you choose to make a purchase using my link. As an Amazon associate, I earn from qualifying purchases. But don’t worry, you won’t pay any more buying through my links and I have sourced and highlighted products that I believe you may find useful in this post.
Getting Started with Upcycling
If you’re new to the world of upcycling, the first step is to familiarize yourself with the basics. You’ll need to select suitable furniture pieces for your projects – look for sturdy items with good bones that are in need of a little TLC. Basic tools like sandpaper, paintbrushes, and paint are essential, along with any additional materials required for your specific project. Once you have your supplies gathered, it’s time to roll up your sleeves and get started.


Preparation Stage
Before you can start painting or refinishing your furniture, it’s crucial to prepare the surface properly. This involves assessing the condition of the piece, addressing any structural issues, and giving it a thorough clean. Sanding the surface will help to remove any existing finish and create a smooth base for painting. When it comes to selecting paint and finishes, choose options that are suitable for the material of your furniture and consider environmentally friendly options where possible. Tikkurila offer a huge range of eco-friendly paint products to suit any finish.

Design and Planning
The design stage is where the magic happens. Let your creativity run wild as you brainstorm ideas for transforming your furniture piece. Whether you’re going for a sleek modern look or a shabby chic vibe, sketching out your design plans can help to bring your vision to life. Consider both form and function in your design, thinking about how the piece will be used and how it will fit into its intended space.
Adding Personal Touches
One of the joys of upcycling furniture is the opportunity to add your own personal touch. Whether it’s through decorative elements like stenciling or decoupage, or simply by choosing colours and finishes that reflect your style, don’t be afraid to get creative. Experiment with different techniques and materials to see what works best for your project, and don’t be afraid to embrace imperfections – they’re what give upcycled furniture its unique charm.


Execution of Upcycling Project
With your design plans in hand, it’s time to start the upcycling process. Begin by applying any necessary repairs or modifications and sanding to the furniture piece, then move on to priming and painting. Check out Tikkulila’s guide on painting furniture. Take your time with each step, ensuring that you achieve a smooth and even finish. If you encounter any issues along the way, don’t be afraid to troubleshoot and problem-solve – sometimes the best results come from unexpected challenges.


Final Touches and Maintenance
Once your upcycling project is complete, it’s important to take steps to ensure its longevity. Applying a protective finish will help to seal and protect the surface, making it more durable and easier to clean. Try Tikkurila’s Helmi Topcoat for a professional looking finish. Take care when reassembling the furniture piece, making any necessary adjustments to ensure everything fits together snugly. And finally, don’t forget to consider ongoing maintenance – regular cleaning and touch-ups will keep your upcycled furniture looking its best for years to come.
Showcase and Share
Now that your upcycling project is finished, why not share your success with the world? Snap some photos of your newly transformed furniture piece and share them on social media or DIY communities. You never know who you might inspire to embark on their own upcycling journey.
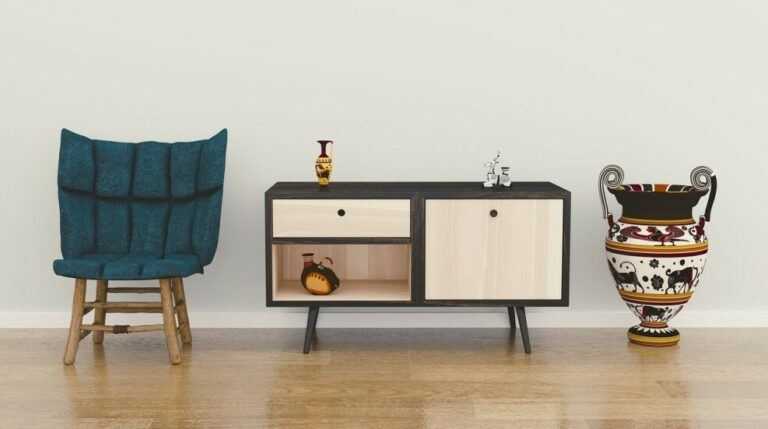
If you love this upcycled look but painting isn’t your thing, you can still furnish your home in upcycled items by sourcing them online by looking at Etsy for example. They have a wide range of upcycled furniture available at very reasonable prices. Check out these examples below.


Conclusion
Upcycling old furniture is not only a rewarding creative outlet but also a meaningful way to contribute to a more sustainable future. By giving new life to old items, we can reduce waste, minimise our environmental impact, and create one-of-a-kind pieces that reflect our personal style. So why not roll up your sleeves and give it a try? With a little creativity and a willingness to experiment, the possibilities are endless.
For further inspiration, check out these accounts below and be inspired!
See Michelle McRae at https://www.instagram.com/shellychicboutique/ for some inspiring furniture upcycles.
Sarah Teresinski upcycles a wide variety of things , including furniture at https://www.instagram.com/redeux_style/?hl=en
Victoria Rance upcycles and sells some beautiful furniture at https://www.instagram.com/houseofrestorations/